Project Management Of Injection Mold
Strategic Pillars of Precision Engineering Excellence
At GREFEE, a well-structured project management plan is the core of delivering excellence in every project. From RFQ to final delivery, effective project management is the key to success.
GREFEE aims to ensure that the mold design and manufacturing process meet customer requirements while ensuring the smooth progress of the project.
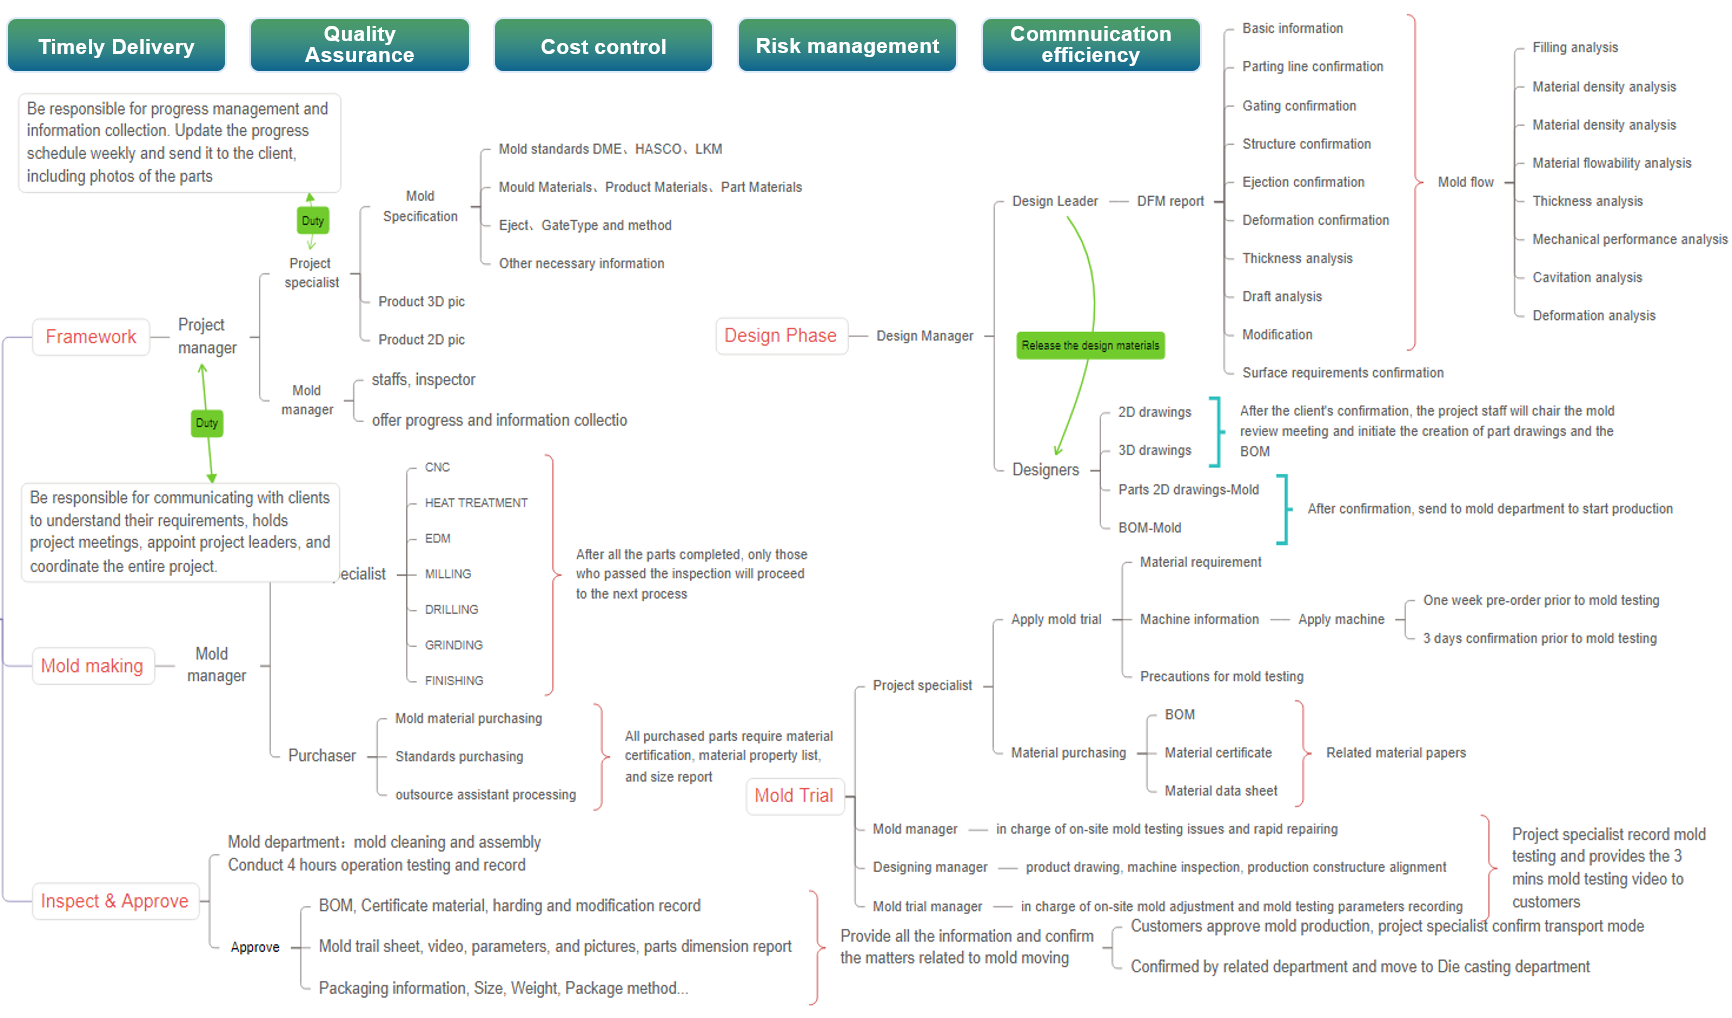
DFM Report(Design and Manufacturing)
DFM report and proposal before mold design for customers review and confirmation.
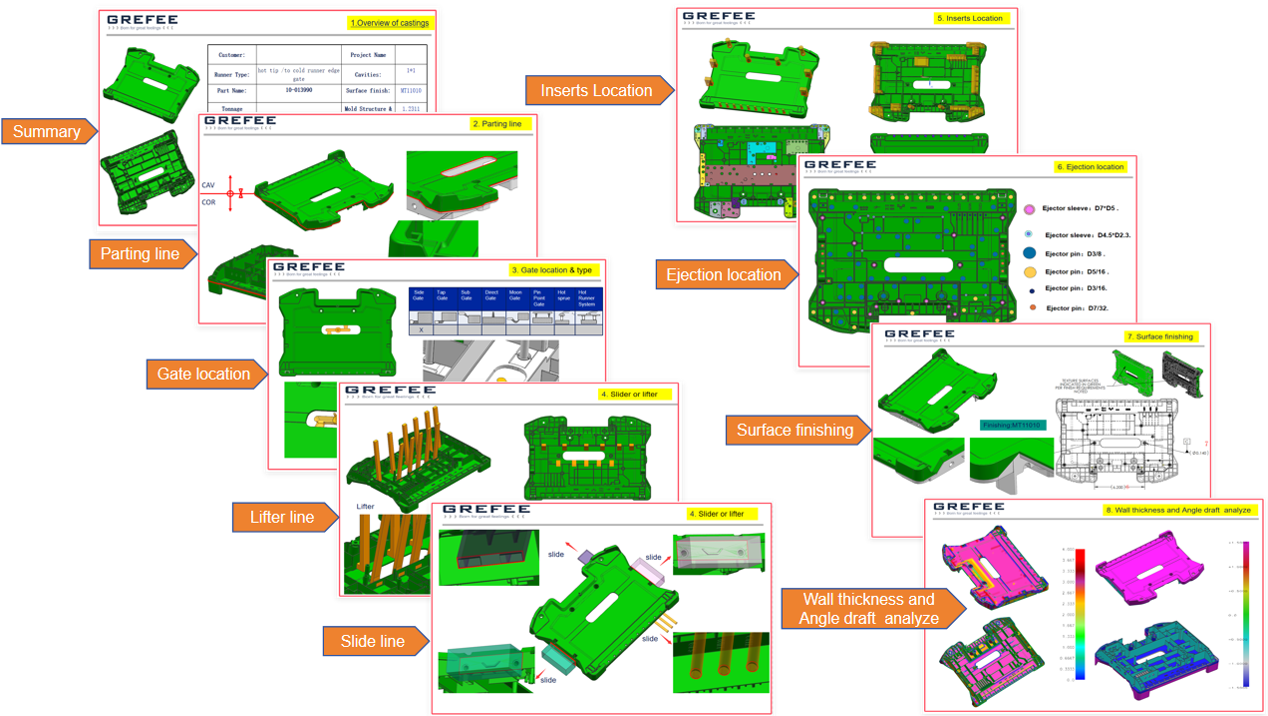
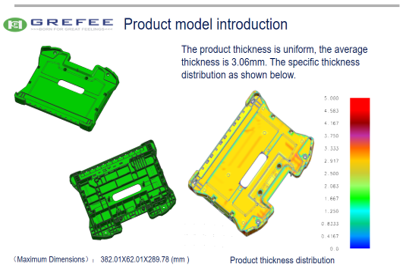
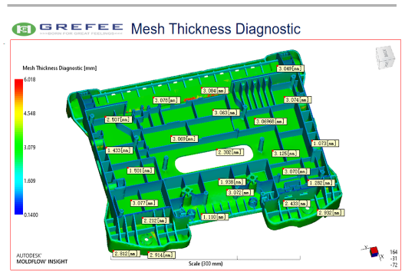
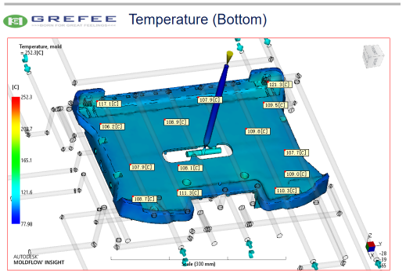
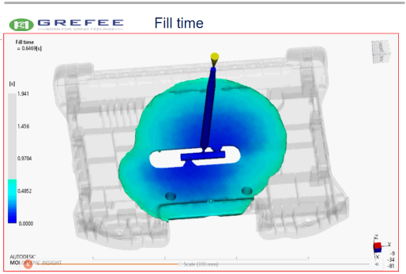
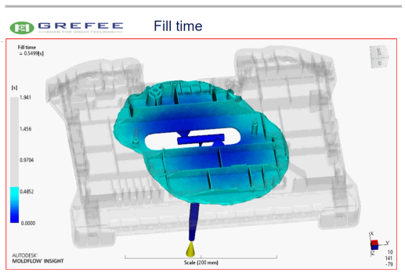
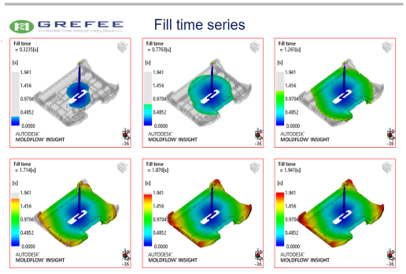
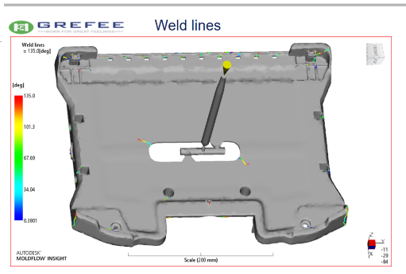
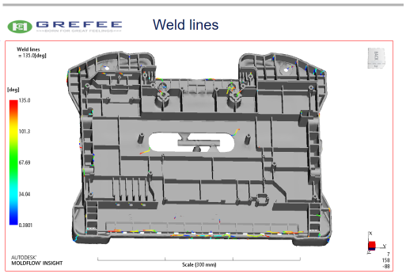
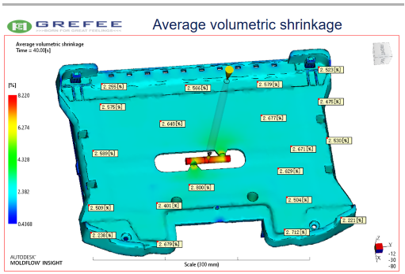
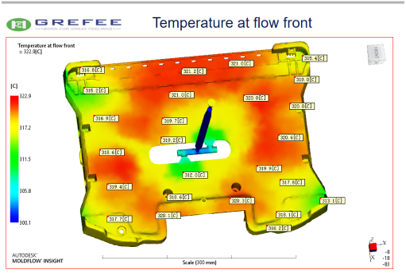
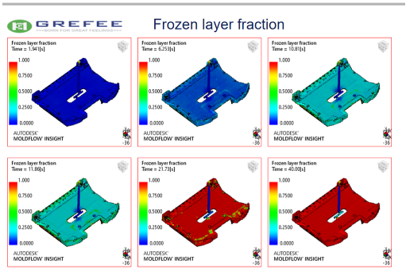
Moldflow Analysis
Mold flow report and proposal before mold design for customer review and confirm

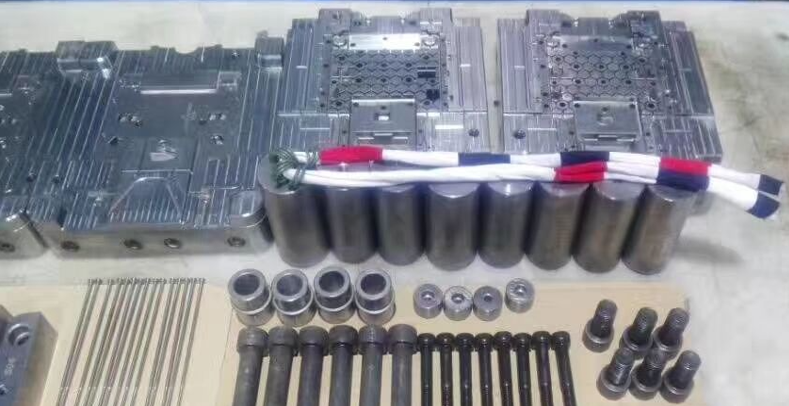
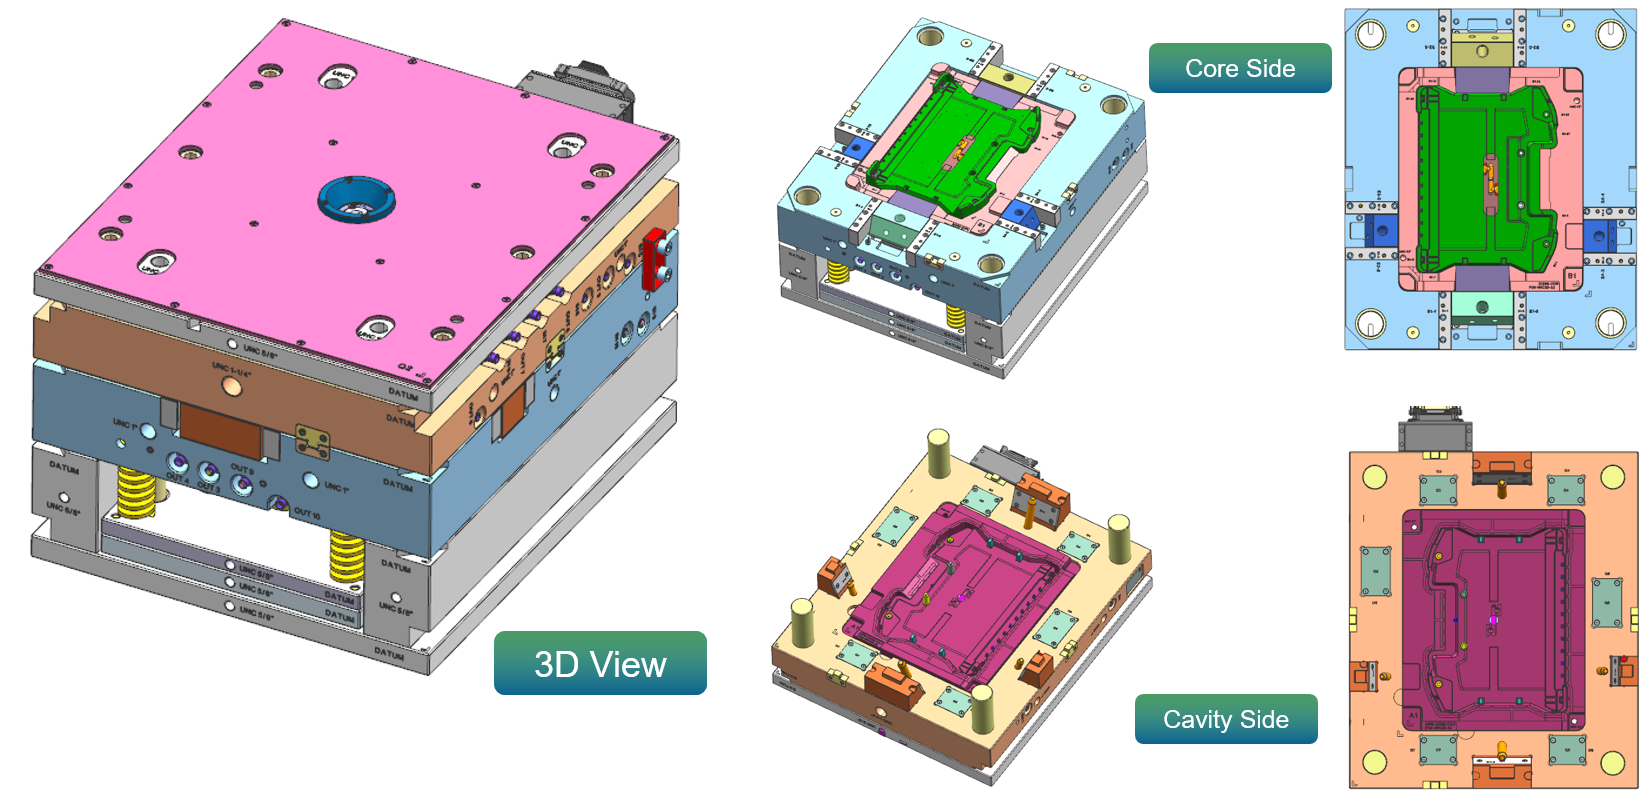
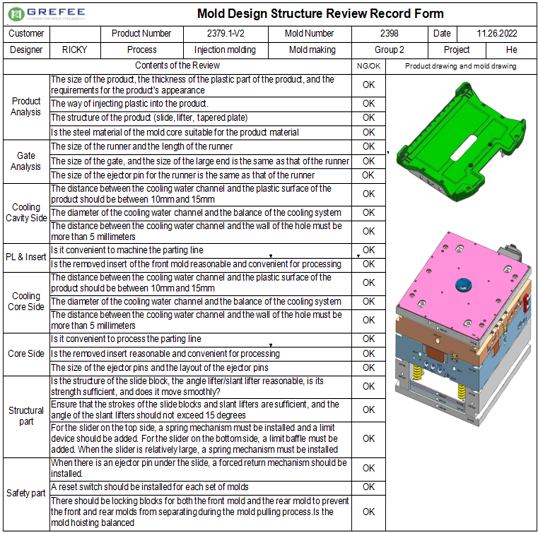
Mold Design ( 3D & 2D )
With all 3D mold drawings completed, the mold designer performs a self-check according to customer requirements. The drawings are then submitted to the mold manager for review. Finally, the approved 3D drawings that meet customer specifications are sent to the client for confirmation.
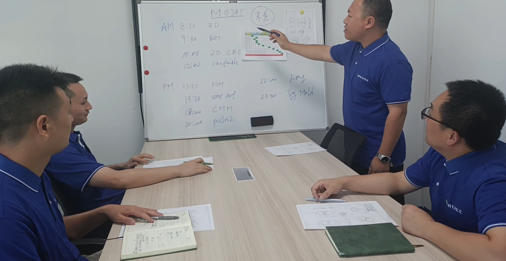
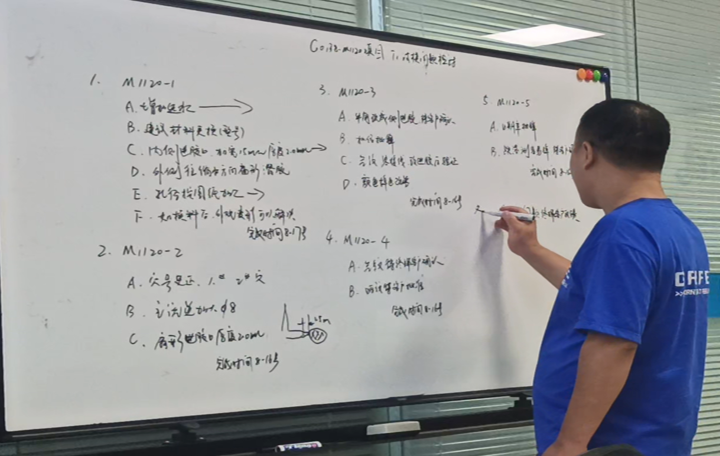
Mold Review Meeting
The final mold review is conducted based on product drawings and machine specifications to ensure the mold meets customer requirements. Additionally, an evaluation is carried out with various departments to ensure both mold quality and delivery timelines are met.

Trial Molding
Pre-Molding Preparation
Material preparation
Confirm material code and type, check masterbatch code and ratio, and ensure the machine hopper is clean.
Mold preparation
Confirm mold number, check alignment with machine components such as positioning ring, nozzle, terminal box, and SR. Inspect special mold features like manual inserts and core pulling mechanisms.
Machine preparation
Ensure no interference between machine and mold, ejector pins match, clean hopper, and check supporting equipment
Others
Check drawings, samples, and inspection tools, and understand drawing requirements and critical dimensions
Trial Molding Steps
Mold setting
1. Pre-installation Check – Check machine 5S, verify positioning ring, ejector pins, terminal box, and mold appearance. Only proceed with mold installation if everything is in order.
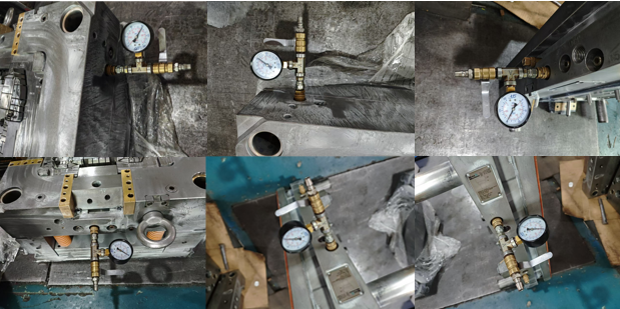
2. Post-installation Testing-Test machine clamping force, adjust locking force, check cooling or heating systems, and preheat the mold
Structure test
1. Mold Opening – Check for issues like mold compression on the parting line during normal mold opening.
2. Ejector Test-Confirm ejector pin position, check ejector plate function during mold opening and closing, adjust ejector force and stroke, verify ejector cycles, and check for interference with other components.
3. Structural Test-Confirm the action sequence of special structures like stroke and inclined ejector, and check for interference with the machine.
Parameter setting
1. Mold Setup-Complete mold parameter recording and ensure no air trap or other issues.
2. Parameter Adjustment-Adjust injection speed, position, pressure, etc., based on product shape.
3. Final Adjustment-Once product integrity is confirmed, adjust mold temperature, injection pressure, speed, cooling time, and find the holding pressure switch point. Verify product dimensions on-site.
4. Automation Setup-Adjust robotic arm and other supporting equipment parameters to achieve automated production.
Record Data saving
1. Material Recording – Record trial material code, baking time, and material temperature.
2. Injection Process Parameters-Fill out the injection molding process card and record core parameters of the injection equipment and supporting devices.
3. Quality Control-QC inspects the product as required, saves samples for reinspection, and submits the report to the client for confirmation.
Off mold and test
1. Pre-removal Check-Inspect and photograph key areas such as the mold parting line, structure, and hot runner, ensuring no damage to internal and structural parts.
2. Pre-removal Preparation-Drain cooling water from the mold and apply rust prevention treatment to moving parts.
3. Machine and Equipment Cleanup-Clean the machine, wash the screw, sort waste materials, return supporting equipment like mold temperature controllers to designated areas, and move the mold to the designated holding area.
Mold Trial Control Process
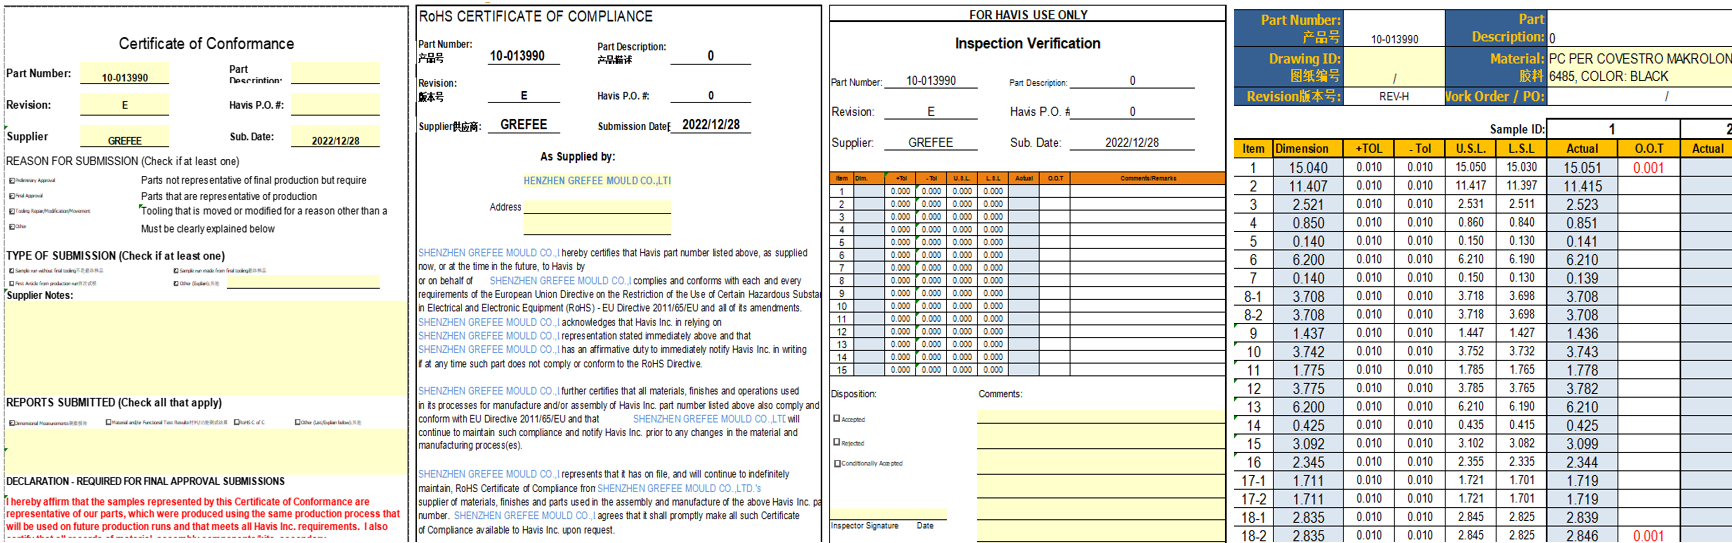
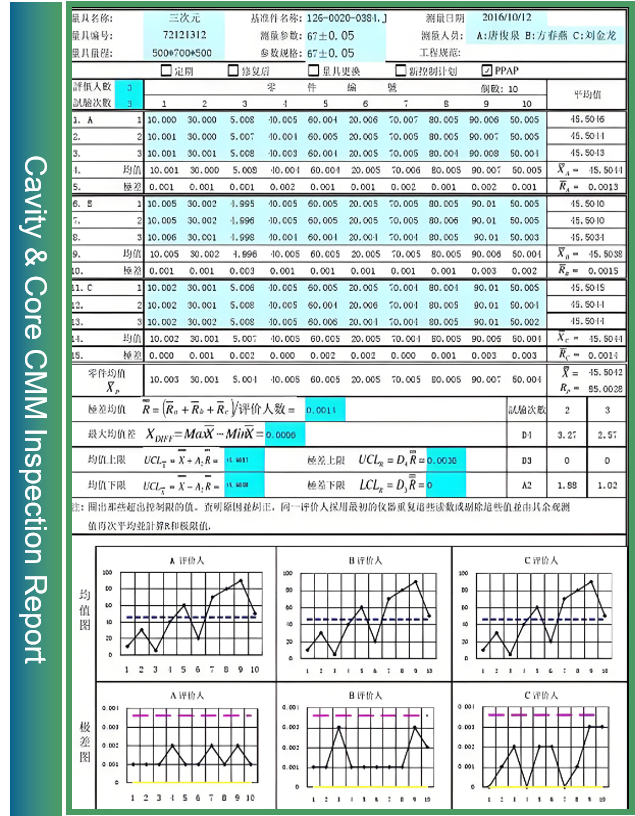
Organize and compile relevant documents, including Certificate of Conformance, Dimensional Report, and RoHS Compliance. Submit to the client, and proceed with mold processing only after document confirmation.
Hold a meeting to discuss molds that don’t meet expectations, summarize mold and product issues, confirm modification plans and timelines. Submit the issues and modification plans to the client for approval, and confirm mold repair and trial dates.
Mold Inspection Control Process
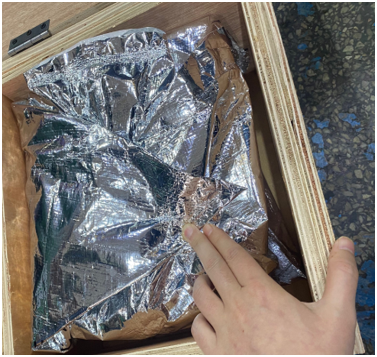
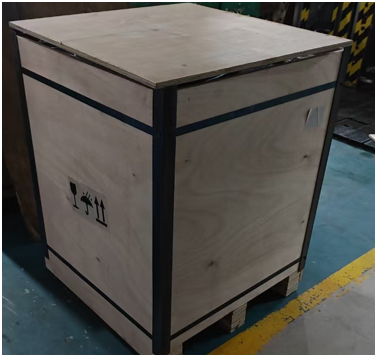
We need to make sure everything are going well in customer side, so after customer confirm samples, we will make 4 hours dry run to test mold running status and open mold to check all components after finished.We have a good packing for mold and parts for shipping, clean and safe.
lUpon receiving client confirmation that the mold meets production expectations and acceptance standards, and before moving to production, take photos of the core mold areas for documentation. Perform final cleaning and maintenance to ensure the mold remains in optimal condition during transport and production.

Post-4-Hour Test-Take photos of the core areas and submit them to the client for confirmation.
Test & Package
Clean all parts, check for potential damage risks, and replace any defective components. Ensure backups are available for critical parts such as nozzles, springs, seals, special ejector pins, seals, and extended nozzles.