How to Design The Assembly Parts and Blot the Plastic Parts Together?

Posted on : April 27, 2022 By GREFEE
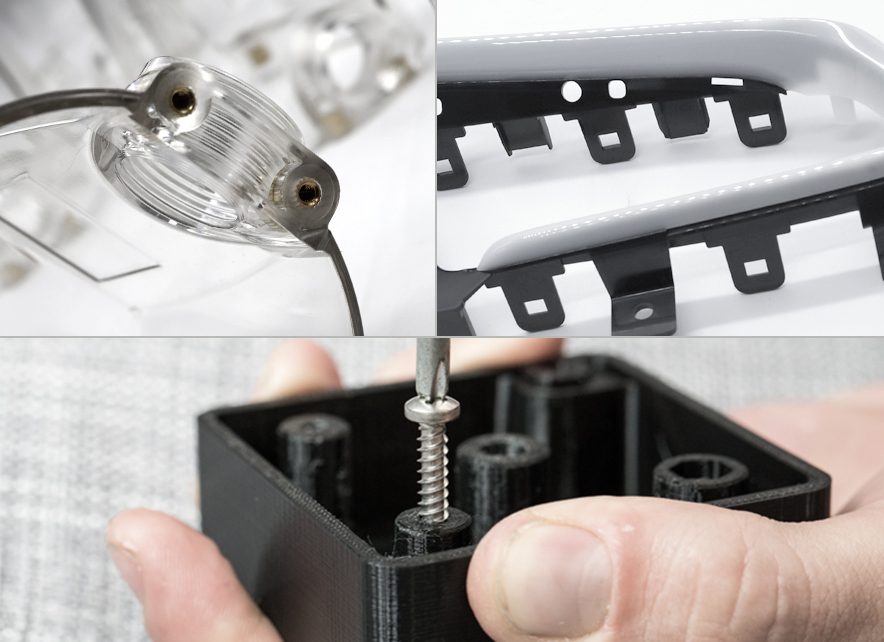
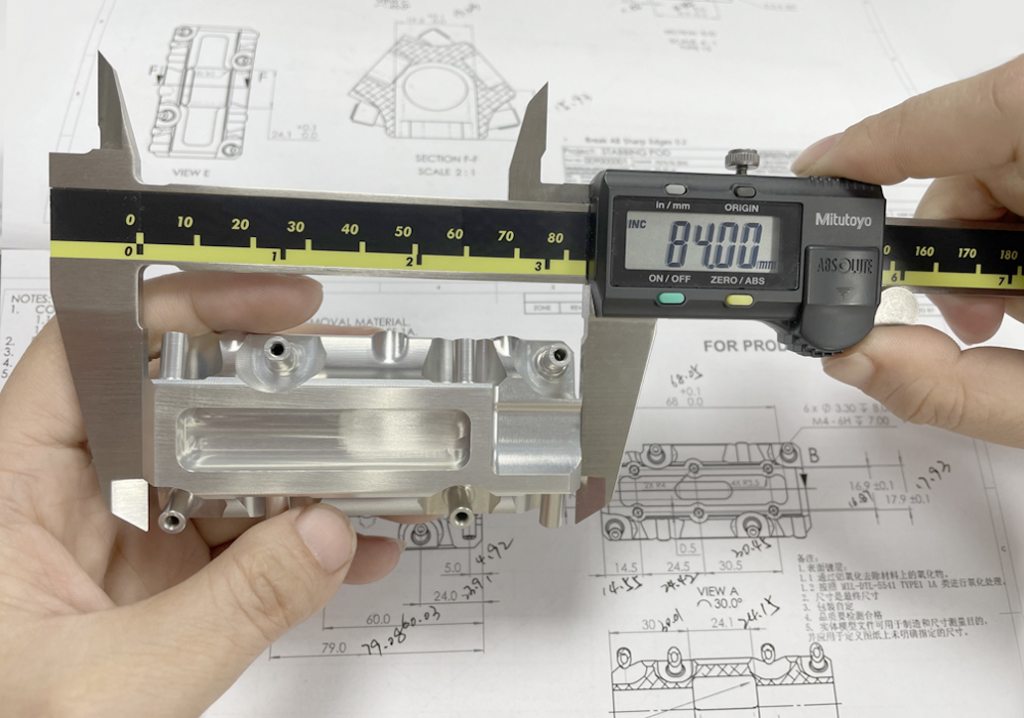
Plastic assembly parts and assembly parts
Common plastic parts usually are made by injection molding or 3D printing. These two methods usually need to assemble two pieces to multi-piece together to form the products that can be sold or used. So, the difficulty level and the stability are the factors you need to consider. At the early stage, we need to consider the issues of whether the manual operation is easy, whether there are any requirements on tolerance, whether there is a foolproof design, etc. GREFEE has almost 20 years of experience in injection molding design and production. To start your new project by working with GREFEE. In this article, we will talk about some design principles and assembly methods of assembly design.
Considerations in designing
1. Try to reduce the number of the parts
A small number of parts means fewer assembly steps, such as some structures that cannot be achieved by the injection molding machine but only through 3D printing. By doing so, the number of parts cannot be reduced.
2. Built-in fasteners
Build assembly features directly into the part as much as possible rather than using the screws. The snap-fit usually is also safe because it is assembled without tools. Sometimes, the screws are necessary, but saving fasteners will consume 50% of the assembly labor force. One thing that needs to note is that the snap-fit will increase the cost of the injection molding.
3. Use same parts in the whole design and the products series
Such as for a parts assembly, one part is M5, 5 x 10 mm socket head cap screw. Another one is M4. Another part of the design of the 5 x 12 mm socket head cap screw.
It has to be interchanged between the different assembly parts during the assembly, so it is easy to assemble mistakenly. Not only do we need to standardize the components on each assembly part but also the whole product line. Where possible, the whole assembly component should use the same assembly parts.
4. building block design
One important application of the common parts is the building block design which will disassemble the design into smaller subcomponents. The subcomponents can be used in various products, such as your first computer. You can put the preassembled parts together without efforts —— mainboard, hard disk, graphics card. Another advantage is that the building block design not only benefits the assembly lines but also the repairing and updating to extend the service life of products.
5. Establish a unique connection
When it comes to desktop computer assembly, from the 90s to the early 21st century, another example of great design can be found in the interior and exterior of the computer chassis. Each one that connects with the mechanics is unique. The mouse cable cannot connect to the monitor port. Do not blur the power cord ports and the keyboard cables.
Of course, the computers and phones that we are using are more advanced. Many ports of these products can be processed by tepc-c and USB, which is an evident improvement.
6. clear direction for parts
If the assembly parts have correct and incorrect directions, we can decide which method. The better thing is to prevent the components from being assembled mistakenly. For circular parts components, it means there is only one breach. More complex shapes can use more complex design plans, such as the asymmetric breach.
7. Make parts easy to operate
Because more and more assembly processes are robots operated, the cost of automation decreased significantly. Robots appear more on the assembly lines.
8. Avoid the precision parts and non-contact areas
Similarly, parts become durable, which helps the robots and people on the assembly line. If the components are too delicate, or if they are easy to break by the natural skin oil, it is easy leads to rework.
Let’s talk about common assemble methods:
1. Ultrasonic welding
The ultrasonic welding is an assembly process that uses ultrasonic vibration to weld the solid plastic. The parts are in the fixed device or fixed jigs under pressure. Meanwhile, the vibration melts the plastic base to form the molecular bond. This process is for selecting the food and drinks, electronic assembly parts, medical devices, and automotive parts.
Ultrasonic welding is proven to have high reliability, durability, and corrosion resistance under awful conditions. Another benefit is that you do not need to worry about whether it will fall off during the early stage of assembly or re-assembly process. It also prevents it from being eroded due to different materials. There is no need for extra materials, such as the solvent, adhesive, or mechanical fastener.
The by-product is quite a few in the ultrasonic welding process. It won’t pollute our products during the process and does not need extra cleaning to remove the cohesive or the solvent. The welding equipment does not need a high cost for maintenance.
Although ultrasonic welding is applied in many industries, it does not suit products that need to assemble. If your product needs disassembly or replacement of the parts, It is better to use the mechanical fixed parts with threaded inserts.
2. The cohesive or the solvent
When gluing the plastic together, there are two main options, adhesive or solvent. The adhere process is composed of two parts, first is one plastic bonding to each type of plastic. The second is solvent-based chemical bounding. The adhesive works as the barrier between the parts, but none of the plastic will occur the chemical reaction. The solvent covers each plastic component in the form of a liquid state till each part is soft enough to be pressed together with the clips and press. After the solvent evaporating, mix the plastic equally to keep it bonding. The solvent should only be used with the thermoplastic, whereas the adhesive is used for most plastics.
3. UV bonding
The UV bonding uses high-intensity UV bonding to solidify or dry the coating or adhesive. In the first stage, due to the equipment investment, the cost for this might be higher. However, it has the advantage of bonding the plastic material with the non-plastic material (such as glass or metal). Indeed, it needs accessory material (coating or adhesive), but it can increase the processing speed and production rate to improve the production quality. Besides, it has better solvent resistance and scratch resistance. It only adopts clear material.
4. Mechanical mounting
The first three choices and the already glued and assembled parts cannot be separated after being glued together by the solvent or adhesive. If your products need to disassemble or do not have permeant bonding, the mechanical fixed parts might be the best choice.
The mechanical fixed parts include the screws, nuts, bolts, rivets, and pins or clips. The other adhesive applications will damage the plastics. To increase the durability of the thread, we need to install a threaded metal insert on the fasteners, which require multi-disassemble.
Methods of mechanical mounting:
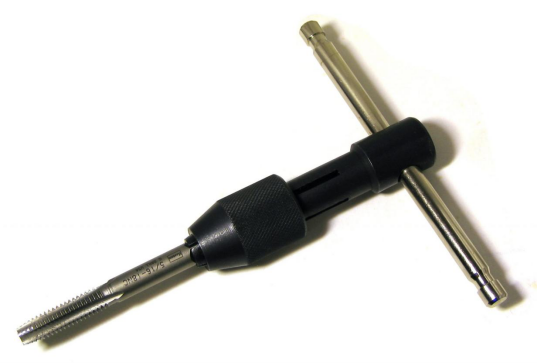
A. Thread inserts
Our first choice is our common method, which is to use the threaded inserts because it is easy to install and good in feeling.
advantages:rapid, simple, clean, unlimited assemble/disassemble; production quality
Disadvantages: expensive, need to increase the wall thickness
Materials and tools: yellow metal inserts; soldering iron; precision knife.
Installation procedures:
- Put the insert into the relevant hole to be pushed in.
- Heat it with the soldering iron. Places it in the middle of the inserts and place a little pressure.
- When warming up the inserts, you will see them sink into the holes.
- Once the blade looks flush with the parts’ surface, please check the mateiral, and trim the other rest material with your accurate blades.
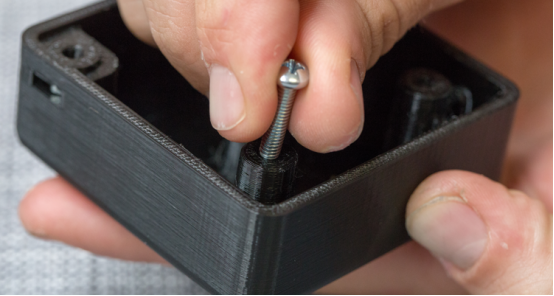
B. self-tapping screw
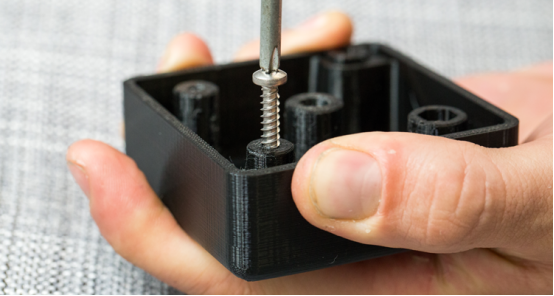
Another method for threaded inserts is the self-tapping screws. If you want quick but unclean products, this is the most simple and cheapest method. If this is your first prototyping or using the low-resolution material, such as PLA, the self-tapping screw is a good choice.
advantages: simple and easy to assemble; lowest design requirements, cheapest.
Disadvantages; brittle material might be broken; limited assembly/disassembly; low strength; material and tools; self-tapping screws.
Installation procedures:
- It is as simple as the screwdriver and screw, just twist it.
Design the threads into 3D printing (only for larger 3D printing components)
When it needs large-scale threaded components in the design, the best is to add the thread design into the 3D model.
Advantages: design custom threads; it is good when inserts are unavailable (M50 threads); suits for brittle material.
Disadvantages: the threads will be worn as time goes on; it is hard to set up the model accurately; it needs high-resolution printing; materials, and tools.None (CAD only)
Installation procedures:
- Ensure accurate thread modeling
- Print components using high-resolution materials
- For the internal threads, using a tap to finish the thread. If you have no taps, please try the mechanical threads.
- For the external threads, please use steel nuts that match your thread size and use it to complete the threads of the parts.
- To completely tap through the hole of the components — this will remove the residual material from the tapping characteristics and prepare parts for fastening.
- For the bind holes, ensure the tapping depth is enough to assemble and clean the extra material. (try to twist the fasteners into the parts with fragments, which will break the function).
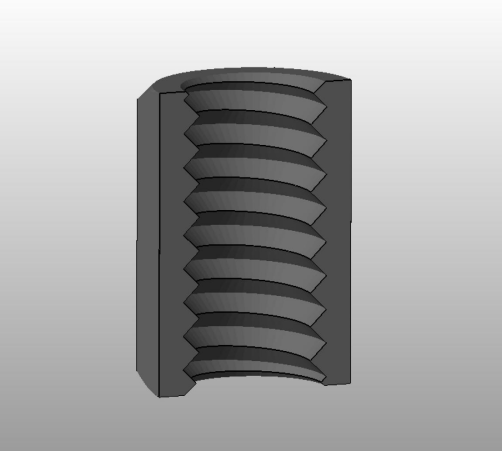
Using this method to add threads on the printing components to ensure it is perpendicular to the characteristics of threads. It is important to note that avoiding cross-threading will cause permanent damage to parts.
Cutting threads with a tap
This is one method of the most traditional thread using methods. In subtractive manufacturing, once CNC places the holes where the threads will pass through, create the needed threads in each hole through a drill tap.
Using 3D printing to do the prototyping, you can use the method which is similar to hand drill tap.
advantages: the assemble/disassemble better than self-tapping screws.
Disadvantages: low strength, plastic wires wear out over time, time intensive
Material and tool: drilling and tapping, screws
Installation procedures:
1. Use the corresponded bit tapping beat threads features to cut the threads.
2. When torque is applied, be careful to not to damage parts.
Fixed hexagon nut
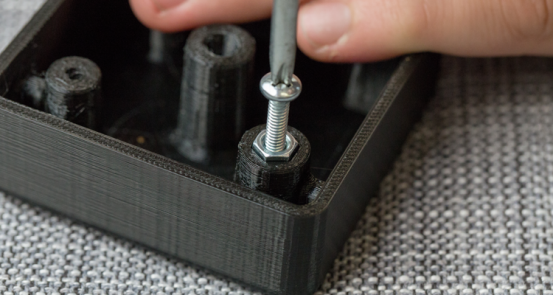
Another solution of to tighten the components together by establishing the printed pocket with hex nut.
Advantages: low cost solution; good clamping force; easy to assemble.
Disadvantages: only suits for the exterior surface; needs extra material to fix the nut; design constraints.
Material and tools: Hexagon nut; screw
How to use this method?
1. Measure the size of the fastener — this is a good resource to help you.
2. Increase a bit tolerance (0.005 – 0.010 inch) on the hole size to fit any size errors.
3. Before pressing the nut into the bags, apply a bit of glue to the nut to make it adhere to the internal surface of the bags. Otherwise, applying the torque on the nut might pull the nut out of the grooves.
Mechanical Considerations
Below, three questions will help you to consider which method suits your project best
1. Whether you need assemble or disassembly parts again?
2. What is your requirements for force or the retention?
3. What are the limits of the inherent geometry or the space constraints?
4. Whether there are requirements on water proof and air tightness?
Besides: when designing the fastening function, please remember this three important factors:
- For hard copies, they should avoid bending along an axis parallel to the plot because the parts printed in this direction are far weaker.
- When adding the assemble characteristics, please be aware of the allowable stress and strain of the materials.
- Before adding the fastener, please check the CAD model. For example: if one needs to add the hexagon nut, the height of the hexagon nut needs to be checked; if it needs to use the threaded inserts, please check the pitch of the installed inserts.
MORE BOLG
Insert mold in injection mold service
What are advantages and disadvantages of Zinc alloy and Aluminum alloy?
Inspection standards for injection molded partappearance
How to judge the quality of your plastic products?
Inspection standards for CNC machining
To ensure that your products are 100% qualified
Categories

Try GREFEE now,for free
We keep your uploaded files confidential and secure.